Don't Neglect Your Gutters: A Complete Guide to Gutter Maintenance and Cleaning
 Gutters are the unsung heroes of home designs of all kinds. They quietly direct rainwater off the roof and away from the building materials to drain away without any fanfare. Their efforts protect not only the attic, siding, and landscaping of a home, but also the foundation and everything in between. Without functional gutters, building materials would quickly suffer from the effects of water damage, leading to the need for extensive repairs. For these reasons, gutters deserve every ounce of attention you can muster throughout the year.
Although gutter maintenance might sound like a tough job, it is actually quite easy to approach. Use this guide to learn what to do and then get started.
Table of Contents
Why Do You Need to Clean Your Gutters?
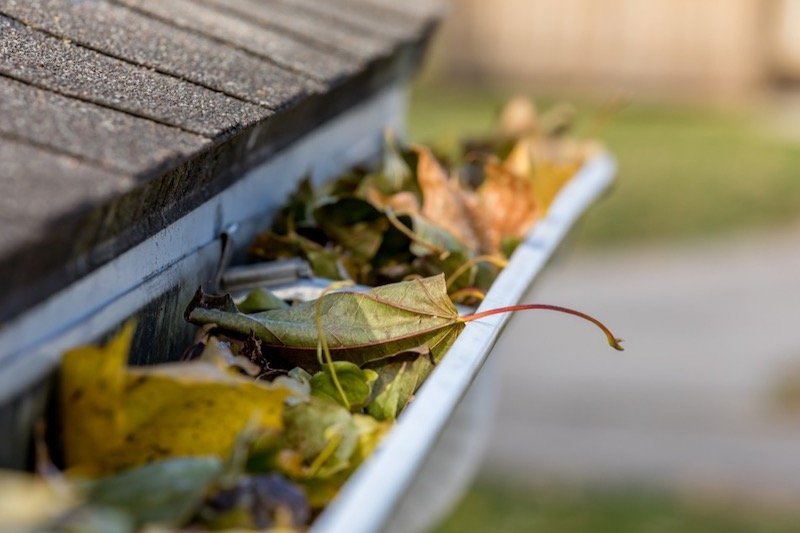
As gutters diligently collect and direct rainwater pouring off the roof, they also catch tons of debris. Leaves, sticks, and more pile up within their channels and effectively create a dam that blocks the water. Moss can also start to grow in that space, creating even more blockages that impede the normal function of the gutters.
Once the water can no longer flow freely through the channels and into the downspouts, it starts to flow over the sides. The water can then seep into the small cracks along all the building materials. As the water seeps into the foundation, it can flood the crawlspace or basement and even weaken the entire home's structure.
The water does not just damage the materials, but also allows mold and mildew to grow all along the affected areas. Without immediate attention, the mold and mildew spreads, damaging the building materials even more and compromising air quality in the home.
Thankfully, all it takes to prevent these problems is frequent maintenance using a few tools you likely already have in the garage. When done regularly, this task takes less than an hour to complete and instantly restores the function of the gutters.
How to Properly Clean Gutters
Although professionals can clean the gutters, it is also approachable as a DIY project. If you plan on completing this task solo, there are some important things to keep in mind before getting started.
By taking the time to explore these details, the gutter maintenance project can be completed successfully. Check out the following to gain the knowledge needed to proceed with this task with confidence you are taking the right steps.
Practice Ladder Safety
When cleaning gutters, ladder safety is key. On single-story homes, ladders sit about 14 feet above the ground. Every story after that is 14 feet higher up, putting people in a precarious situation as they clean. Fortunately, with the following safety tactics, it is possible to stay steady and secure while on tall extension ladders.
Pick the Right Ladder
The right tool for the job goes a long way in ensuring safety, so do not just use any ladder when cleaning the gutters. For most one- to two-story homes, a 20-foot or taller extension ladder is often the best choice. The height allows you to reach into the gutters without straining, keeping your feet firmly planted on the rungs.
Beyond that, choose a ladder with adjustable legs for use on uneven surfaces and swivel safety shoes for phenomenal grip. To avoid scuffing the outer surface of the gutters, look for a ladder with mar-resistant rail ends. Verify the ladder has the proper load rating for your intended usage, as the weight they can support varies considerably across all models.
Follow Best Practices
With the right extension ladder on hand, follow these best practices to stay safe:
- Look around for electrical hazards before carrying and placing the ladder
- Inspect the ladder for defects before placing it against the house
- Place the ladder at the proper angle, equal to ¼ of the working length
- Tie off the ladder at the base using a secure structure or stake
- Secure the locks before attempting to climb the rungs
- Never stand on the top three rungs for any reason
- Always maintain three points of contact on the rungs
- Read the included warning labels and follow the given advice
- Use fall protection on ladders above 24 feet
Be Aware of Power Line Hazards
Before using ladders of any kind, it is important to assess all power line hazards in the area. Although only metal ladders can conduct electricity and result in immediate shock, all varieties could knock down the lines if they bash into them.
Take a quick look around the area, noting where the power lines go from pole to pole and to the house. Then, route your path far from those areas, keeping them in mind at all times. Always carry the ladder horizontally to avoid mistakes that could result in hitting the power lines.
Wear Protective Gear
In addition to using the right ladder, your safety depends on using protective gear as you clean. Use shoes with rubber non-slip soles that are firmly secure to your feet with straps or ties, as these will help you maintain a secure grip on the rungs as you climb the ladder. Additionally, non-slip shoes will provide the appropriate amount of grip when getting on the roof is unavoidable.
Gloves can help in keeping you safe by providing extra grip on the rungs and preventing hand injuries. Latex-coated cloth gloves tend to work best, as they provide protection and grip while allowing hands to remain nimble. Choose gloves that fit well, as excess loose material could allow the gloves to slide around during use.
Do not forget about eye protection. Although the risk is low, if debris gets into the eyes, it could scratch the cornea or cause other injuries. Additionally, eye protection helps prevent falls by preserving vision. Select protective eyewear that securely grips around the ears or has a secure strap that slips around the head.
Clean Off the Roof
Cleaning the roof off before clearing the gutters improves the roof's aesthetics and protects the shingles from damage over time. To complete this important task, you will need to:
- Choose a cloudy day with mild temperatures
- Assess the roof height and slope to determine if you should wear a harness
- Mix up equal parts water and chlorine bleach and pour into a sprayer
- Hook the sprayer onto the garden hose and turn it on at the faucet
- Cover all nearby plants and other landscaping elements with plastic
With these steps complete, climb up the ladder while wearing safety equipment and carrying the garden hose.
Carefully step onto the roof and move to the highest point. Spray down the shingles, pushing the debris toward the gutters. Cover the entire surface with the cleaning solution to kill any moss and mildew on the surface of the roof. Over the next few days, the moss and mildew will die off and rinse away during the next period of heavy rainfall.
Utilize a Garden Hose and Gutter Scoop
The majority of the gutter cleaning job requires a garden hose and gutter scoop. With these two tools, it is possible to clean out the leaves, sticks, and other debris with ease.
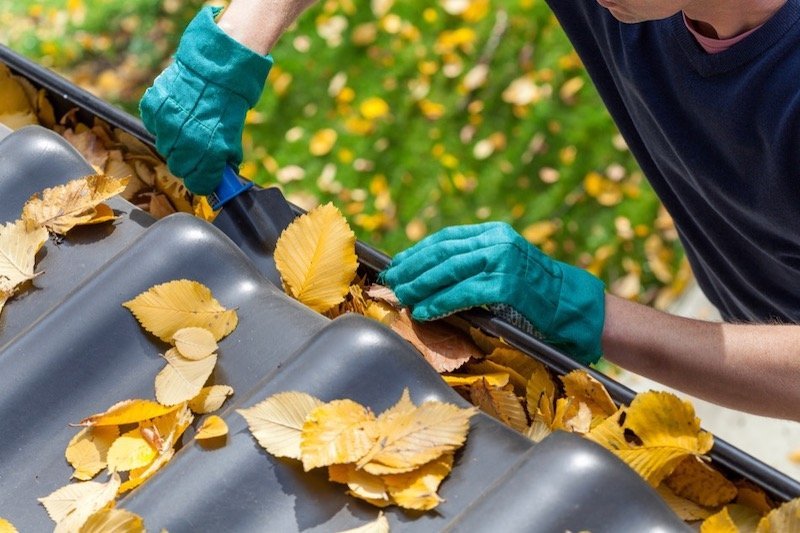
Start the cleaning task using the gutter scoop to remove the majority of the debris. This tool is commercially available from hardware stores, though it is possible to make your own by taking a plastic quart milk bottle and cutting off the bottom at a sharp angle.
Using this tool is as easy as grabbing the handle and sliding the angled end into the gutter. Then, lift and dump the collected leaves and more into a bin for later disposal. Repeat down the entire length of the gutter until all the debris is removed.
Small leaf fragments will likely remain upon finishing this process. To remove them, fit a garden hose with a spray nozzle that allows pressure adjustments. Turn the nozzle to high pressure and spray starting far from the downspout. Keep close watch on the debris, ensuring it all goes down the downspout to the ground below.
Unclog the Downspouts
As debris builds up in the gutters, a portion makes its way through the downspouts toward the ground, often getting stuck inside the vertical channel, especially when small sticks and other long pieces hit the sides. This problem tends to worsen as you spray the remaining debris out of the gutters while cleaning.
To check for clogs, run the garden hose on full blast at the top of the downspout. If the water backs up, or is slow to come out the other end, cleaning is in order. In most cases, it is wise to clear them out every time you clean the gutters to keep buildups from occurring.
You have several methods at your disposal to clear out the downspouts:
- Tapping along the downspout from top to bottom to knock everything loose
- Driving a handheld auger through the downspout opening using a clockwise motion
- Sucking the leaves, sticks, and other debris out using a wet/dry vacuum
If these methods do not work, consider using a pressure washer to clear everything out. Do not allow the pressure washer stream to come into contact with roofing materials or painted surfaces. If that happens, the high pressure stream could break the shingles and strip the paint right off, leaving an unsightly surface behind.
Schedule Semi-Annual Cleanings
Gutters are quick and easy to clean when done regularly; only when the debris builds up does it become difficult. Allowing the leaves to build up also increases the risk of downspouts clogging up, creating even more problems down the line. To avoid this problem, create a strict cleaning schedule for both the gutters and downspouts. Most households can get away with a semi-annual schedule with cleaning sessions at the end of spring and fall.
Homes with many large trees nearby, however, may need more attention. In this case, consider quarterly sessions and assess the level of debris to see if you need to clean even more often. It may be necessary to clean monthly during the fall, for example, when trees drop their leaves and less often during the rest of the year.
By responding to the unique needs of the home, it is possible to keep up with gutter maintenance and ensure the channels stay clear of debris. Otherwise, leaves and much more will undoubtedly pile up and create problems later on.
How to Winterize Gutters
As winter draws near, gutters need even more attention to ready them for the cold weather. This is especially important in places where a lot of rain and snowfall occurs. Otherwise, the gutters may not work correctly or could even fall as snow, ice, and debris build up in the channels. Follow these steps to prepare for winter and rest assured the house is ready for the cold weather.
Clean Leaves and Other Debris
Winterizing the gutters always starts with a thorough cleaning session. Follow the steps above in setting up the ladder, wearing protective gear, and avoiding power lines to start. Once you are ready, clean off the roof with a bleach and water solution before moving on to the gutter cleaning process.
Once those steps are done, scoop all leaves, sticks, and other debris out of the channels of the gutters. After that, rinse away the smaller pieces with a garden hose, making sure to use the highest pressure setting on the spray nozzle. Then, check the downspouts and clean them as needed to finish this important step.
Repair Sagging Metal Gutters with a Gutter Hanger
After you clear the channels of debris, take a moment to inspect the mounting points and hardware for any wear or damage. If it looks like the gutters are sagging or will be soon, fix them to prevent rain, snow, or debris from knocking them loose.
Depending on the condition of the hardware, you will either need to drive the screws back into place or replace them altogether. If the mounting holes are hogged out, then replace the hardware with the next size up at the very least. Avoid future gutter sagging issues by using extra-long screws that drive into the lumber in the rafters.
Additionally, ensure the gutter hangers securely hook around the front and back edges to hold it all in place.
Fix Leaky Gutters
When leaky gutters strike, they allow water to flow out of the seams and end caps instead of through the downspout. The water then seeps into cracks in the building materials, causing extensive damage and resulting in mold growth that demands the replacement of all affected materials.
Due to the risks of damage to the home, plan to perform repairs at the first sign of a problem. To complete this process, you will need:
- Gloves
- Eye protection
- Cordless drill with 1/8” bit
- Swivel head rivet tool
- 1/8” rivets
- Garden hose
- Fine metal scrub brush
- Gutter and flashing sealant
- Replacement end caps
- Rubber mallet
- Pliers
- Rags
Then, follow these steps:
- Start by removing the end cap with the rubber mallet
- Use pliers to straighten out any bent areas along the end of the gutter
- Clean the edge of the gutter with the fine metal scrub brush
- Rinse the cleaned area and thoroughly dry with a rag
- Apply a thin bead of gutter and flashing sealant to the new end cap
- Snap the end cap onto the gutter and tap firmly in place with the mallet
- Wipe off any excess sealant that drips out along the edges
- Drill pilot holes two inches apart along the lip of the gutter cap
- Use the rivet tool to drive rivets through the pilot holes
- Apply a bead of sealant along the inside and outside of the end cap seam
- Repeat for all the end caps on the gutter system on the house
One this has been completed, clean around other leaky seams using a fine metal scrub brush, then rinse the area clean and dry it thoroughly. Apply sealant around the inner and outer surfaces of the seam to make the gutters watertight once again.
Add Gutter Guards
With gutter guards in place, the channels do not need cleaning nearly as often and rarely, if ever, fully clog. These guards are either a simple mesh, curved surface, or brush filter that allows water to drain while blocking leaves from entering the channels. The leaves can still pile up on the surface of the guards, however, so they do not completely prevent the need to clean the gutters.
These guards come in a variety of styles to suit every home, with the most popular types made from drop-in screens, surface-tension guards, and brush filters. Across all varieties, installation only takes a few hours and is easily completed as a DIY project or by a professional.
Install Gutter and Roof Heating Cables
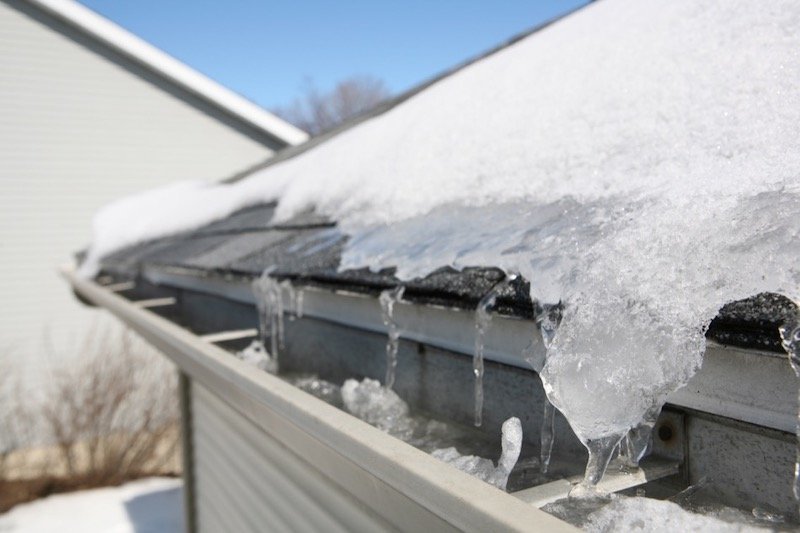
If temperatures dip down into freezing in your area, then gutter and roof heating cables are a must. These cables keep the roofline warm enough to prevent freezing, which protects the home from ice dams.
Ice dams develop as snow starts to melt during the midday hours, then freezes again as temperatures drop at night. This puts enormous pressure on the gutters, often causing them to fall. As the ice melts again and again, it causes even more problems by allowing water to leak into the soffits and drip down into the walls.
Heat cables can help by melting the snow before it has a chance to accumulate. To be effective, this cable must run along the roofline, through the gutters, and through the downspout. Otherwise, the water could freeze at any of those points, creating a big problem down the line.
DIY vs Hiring a Professional: Gutter Cleaning and Replacement
Although cleaning gutters is pretty straightforward, it is not for everyone. If it is not possible to follow all safety recommendations, for example, or is just outside your comfort zone, then leave it to the professionals. When uncertainty arises, however, weigh the pros and cons to see which route to take.
DIY
If you have the tools and feel comfortable completing the gutter cleaning process, then this makes for a great DIY project. Unlike many other home improvement tasks, there is no need for professional equipment. In fact, many likely have the required tools at home already.
Additionally, the task only takes an afternoon at most, as long as you follow a regular schedule. By the end of the day, you can walk away feeling good about doing work on your own home. Plus, you will save money, especially if a few simple repairs were completed along the way.
The biggest drawback to DIY projects is missing a key sign of a problem due to inexperience. If the gutters are leaking into the home, for example, professionals can easily spot the issue and identify an appropriate fix. Leaving leaks and other issues undiscovered can prove very costly in the long run, negating the money saved with DIY.
Professional
When time comes at a premium, you may want to have a gutter cleaning expert handle the job. This is also a great idea if the household does not have the tools or if the task is outside your comfort zone.
Experts can quickly complete the job in just a few hours using their own tools and know-how. Although this job costs about $150 on average, having a professional handle the task offers complete peace of mind. While cleaning the gutters, the professional will assess the condition of the home and indicate if it needs any work now or in the near future.
What Is a Gutter Guard?
If you want to extend the time between maintenance sessions, then gutter guards may be the answer. These innovative shields manually block most leaves and debris from entering the inner channel. Water can still flow freely into the gutter, however, as the leaves sail over the edge instead.
With the guards in place, it is possible to extend out cleaning sessions by a month or more, though you cannot skip cleaning altogether. Large pieces of debris can occasionally stick to the top of the guard, necessitating their removal on a semi-regular basis. Choosing the right type of gutter guard can reduce this situation and allow for extended periods between cleaning sessions.
Types of Gutter Guards
There are many gutter guards to choose from to best suit a variety of home styles, budgets, and personal preferences, including:
Drop-In Screens
The drop-in screens sit right on top of the gutter channel, effectively blocking everything from leaves to pine needles from entering. The tiny mesh still lets water flow through unrestricted, even during heavy rainfall. This solution is budget-friendly, especially with the plastic models. Metal drop-in screens are more expensive, though stand up to the test of time a bit better.
Because the mesh sits flat against the top of the gutter, however, leaves tend to build up a bit on top during the fall months.
Surface-Tension Guards
Surface-tension guards look like curved plastic caps that hook over the top of the gutters. They have a small opening along the front that lets water pour in as it rains. Leaves, pine needles, sticks, and more flow over the edge toward the ground, keeping the gutters clear of debris.
Because of the solid, curved surface, debris rarely sticks to the top of the gutters. Small fragments can still flow inside because the opening is much bigger than the holes in the drop-in screens. The tiny pieces tend to flow out of the gutters and through the downspouts without creating clogs, except in areas with a lot of pine needles. Because the caps are so visible, this option is less attractive than the screens, though requires a lot less maintenance.
Brush Filters
Brush filters fill up the cavity inside the gutters with a cylinder of bristles. The bristles block debris from flowing into the channel while allowing water to go through.
Of all the options, this type of guard is easiest to place, making it an approachable project for DIY enthusiasts. They are also budget-friendly, with most systems going for less than $5 per foot.
Because they sit deep in the gutter, the brushes do not change the appearance of the gutters. They do tend to capture debris on top more often than the other types, however.
How to Install Gutter Guards
After selecting the ideal guard style for the gutters, it is time to approach the installation process. Most DIYers can approach it on their own, but professionals are always poised to help if need be. To get started, gather the following items and go through the process step by step.
Supplies
The tools and materials required for this project include:
- Ladder
- Personal protective gear
- Fine metal scrub brush
- Garden hose
- Cordless drill
- 1/4" screws
- Tin snips
- Tape measure
Use a tape measure to record the length, width, and depth of each gutter before purchasing the ideal gutter guards. Bring that information to the hardware store to pick up guards that will provide the perfect fit. Let the gutter guard supplier know the slope of the roof as well to verify the selected model will work right for your needs.
Steps
Before getting started, make sure to set up the ladder using the best practices listed above to safely climb up to the gutters. Always wear protective gear, especially when working with the drill to create holes and fasten hardware.
Follow these steps to have gutter guards installed in no time.
- Assess the condition of the gutters to find spots to apply sealant
- Reseal and repair the gutters to make them watertight and function appropriately
- Clean the gutters with a fine metal scrub brush and rinse with a garden hose
- Clip the screen or shield to the front of the gutter near the end cap
- Slide the back edge of the shield or screen under the edge of the shingles
- Repeat with the next piece, making sure to overlap the edges by ½ inch
- Use tin snips to cut the last panel to the right length before completing its installation
For those living in areas with high winds, use sheet metal screws to secure the gutter guards in place. Do not use too many, however, as it will be necessary to remove a few panels for cleaning every once in a while.
Brush filters are easier to install than the other varieties because they just sit in the channel. All you have to do is slide them in one by one from one end cap to the other. If the last one does not fit perfectly, cut it to length using the tin snips.
Are Gutter Guards Worth It?

Although some types of gutter guards capture debris along the upper edge, they rarely allow a full blockage. This keeps the water flowing through the channels and downspouts instead of over the sides and into the home.
Their ability to keep water moving in the right direction makes them well worth the expense and time installing them. As an added benefit, most types reduce the number of cleaning sessions needed each year to just two at the most, even in areas with many trees.
Regular inspections should still be performed. If the guards suffer any damage from branches or wildlife, they will allow leaves, pine needles, and other debris to clog up the opening and the channel beyond.
Even without that problem, gutter guards make it a bit harder to clean out the channels when it comes time to do so. In most cases, at least one small section will need to be removed to access the inside of the gutters and clean them out. A high-pressure spray nozzle on a garden hose can help as can a wet-dry vacuum. Experiment with different cleaning methods to work around the guards and thoroughly clear out the gutters to your satisfaction.
Even with these difficulties, gutter guards prove well worth it for most households. They keep debris out and water flowing through the channel to prevent costly leaks around the edges, and reduced maintenance requirements make it even more worthwhile.
With the right level of care for gutters, they can easily perform their expected function and protect the integrity of a home. All it takes is removal of the debris from time to time to keep the channels moving water through the downspouts. With this move, the gutters will help prevent leaks into the attic, foundation, and everywhere in between.
Even with gutter guards installed, twice-yearly inspections and cleanings are best to ensure the channels stay clear of all leaves, pine needles, and more. You can either elect to do the job yourself or leave it to a professional. Experts are always available to take over whenever you do not feel up to the job or simply want to hand it over to a pro. Either way, the time and effort put into the task will go a long way in ensuring your home stays in top shape through the years.